
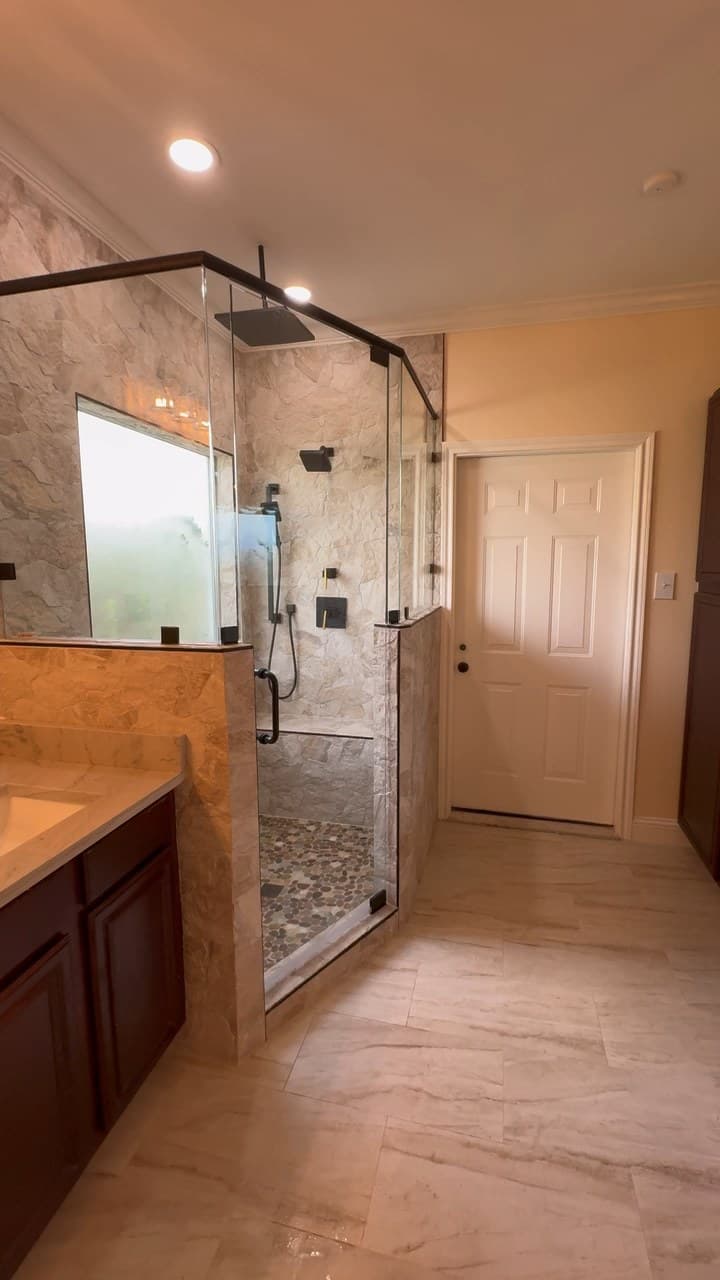
Bathroom layout remodel in Tyler TX with freestanding tub, glass shower, pony wall, tile floor, and vanity by Pioneer Construction

East Texas Planning Resource

East Texas Home Remodeling Planning Guide

A practical start-to-finish guide for homeowners, realtors, and property managers who need to define a remodel, compare estimates, prepare an occupied home, and keep project decisions organized.

Last reviewed July 31, 2026. General planning guidance only; permit and contract requirements depend on the project and jurisdiction.

A remodel becomes easier to compare and manage when the project is written down before finishes take over the conversation. The first useful document is not a mood board or a product cart. It is a short brief that explains the problem, the intended outcome, the boundaries of the work, and the decisions that remain open.

This guide is intentionally broader than Pioneer’s room-specific articles. Use it as the organizing layer, then open the narrower resources when you need to compare contractor estimates, understand a bathroom remodel timeline, review tile-shower waterproofing, or confirm whether the address fits Pioneer’s current service area.

Step 1

Write a one-page project brief

A useful brief gives every contractor the same starting information and gives the household a way to separate requirements from preferences.

Problem to solve

Write down what is failing, uncomfortable, unsafe, hard to clean, or no longer useful before choosing finishes.

Rooms and boundaries

Name the rooms, surfaces, fixtures, and adjoining areas that are in scope—and the areas that should stay untouched.

Must-haves

List the outcomes the project needs to deliver, such as better storage, an easier shower entry, improved lighting, or durable flooring.

Nice-to-haves

Separate optional upgrades from the decisions that would make the project worthwhile even if the optional work is deferred.

Decision makers

Identify who approves scope, selections, schedule changes, and additional work so decisions do not stall after demolition begins.

Known constraints

Record access limits, occupied rooms, pets, children, work-from-home needs, travel dates, and any building or neighborhood rules you know about.

Add measured sketches, inspiration images, and photos of existing conditions only after the written brief is clear. Photos help explain the room, but they do not show every condition behind a wall, below a floor, or inside a cabinet run. Treat them as context rather than a substitute for an on-site review.

Step 2

Set priorities and keep room for decisions

A realistic plan protects the must-haves first and leaves a documented way to respond when selections or concealed conditions change the scope.

Put the project priorities in order. If better access matters more than a specialty finish, write that down. If storage matters more than moving plumbing, make that visible. Priorities help the owner and contractor evaluate alternatives without reopening every decision.

Keep a decision reserve rather than assuming the first proposal total covers every future choice. The appropriate amount depends on the age and condition of the home, how much work is concealed, how many selections remain open, and what the written agreement says. This is planning guidance, not a universal percentage or price rule.

Use the reserve only after the issue is described. A useful decision record states what was found or requested, the proposed response, the cost and schedule effect, and who approved it. That keeps a project change from turning into an unclear verbal memory weeks later.

Step 3

Compare estimates line by line

Two totals are not comparable until the scope, materials, preparation, responsibilities, and unknowns are comparable.

Proposal termWhat to clarify
Included scopeThe work, materials, labor, preparation, protection, cleanup, and closeout the contractor has actually included.
ExclusionsItems the contractor is not pricing. An exclusion is not automatically a problem, but it should not be discovered after work begins.
AllowanceA placeholder amount for a selection that is not final. Ask what quantity, quality level, tax, delivery, and installation assumptions sit behind it.
Fixed selectionA named product, finish, model, size, or specification already chosen and included in the proposal.
Owner-supplied itemSomething the homeowner buys or provides. Confirm ordering, delivery, inspection, storage, missing parts, damage, and warranty responsibility.
Unforeseen conditionA concealed issue that could not be fully evaluated before opening the work area. Ask how it will be documented and priced if found.

Ask each contractor to explain demolition, disposal, floor and dust protection, preparation, installation, trade coordination, cleanup, and final documentation. A lower total can reflect a smaller scope, a different material assumption, or work assigned to the owner. A higher total can still contain gaps. The written details—not the direction of the price difference—show what is actually being compared.

Step 4

Build a selection and lead-time schedule

The schedule is more reliable when the products needed first are selected, verified, and available before the room is opened.

Make one list of every visible selection and every hidden component the contractor needs to coordinate. For a bathroom, that may include tile, trim pieces, grout, waterproofing components, drains, valves, fixtures, glass, vanity, counter, mirrors, lighting, accessories, paint, and flooring transitions. A kitchen list may include cabinets, hardware, counters, sink, faucet, appliances, backsplash, lighting, flooring, trim, and clearances.

Record the manufacturer, model or collection, size, color, quantity, source, order status, expected arrival, storage location, and person responsible for checking the delivery. “Ordered” does not always mean “complete.” Open cartons when appropriate, confirm quantities and finish consistency, and report damage or missing parts before the installation date.

If a product becomes unavailable, compare the substitute against the original requirement instead of choosing by appearance alone. Dimensions, rough-in needs, edge details, installation method, maintenance, and compatibility with adjacent materials can matter as much as color.

Step 5

Verify permits for the exact address and scope

Permit and inspection requirements are jurisdiction-specific. A rule for one city—or for an address outside city limits—should not be copied to another project.

Ask which authority has jurisdiction over the project address, what work requires review, who will apply, which documents are needed, and which inspections must be completed. Plumbing, electrical, structural, accessibility, floodplain, septic, or neighborhood requirements may involve different authorities or qualified trades.

The links here are official starting points, not a permit determination. Confirm the current requirement directly with the responsible city, county, or other authority before work begins. This guide is not legal or code-compliance advice.

Step 6

Prepare the occupied home

The work zone is only part of the plan. Daily access, dust, noise, utilities, children, pets, and temporary routines affect the rest of the household.

  • Agree on daily entry, parking, lock, alarm, and gate procedures.
  • Identify the work zone, material staging area, cutting area, and debris route.
  • Move valuables, wall hangings, fragile items, and small furniture away from vibration and traffic paths.
  • Decide how dust barriers, floor protection, ventilation, and daily cleanup will be handled.
  • Plan bathroom or kitchen downtime, including a backup routine before demolition starts.
  • Keep children and pets separated from tools, cords, debris, open walls, and partially completed work.
  • Set quiet-hour or work-from-home expectations before the schedule is finalized.
  • Choose one communication channel for questions, approvals, photos, and schedule updates.

Step 7

Plan payments and change orders before they are needed

A project is easier to administer when approvals, payment milestones, and scope changes use a consistent written process.

Read the proposed payment schedule together with the scope and schedule. Ask what each milestone represents, what materials or work should be present, which approvals are required, and how invoices will be delivered. Keep payment records with the signed agreement, selection log, and approved changes.

A useful change order is specific. It describes the existing scope, the requested or discovered change, the revised work, the price effect, the schedule effect, and the approval. Photos or drawings can help when the change involves a hidden condition or layout conflict. Avoid relying on an informal conversation as the only record.

Contract terms and lien, insurance, payment, or dispute requirements can vary. Ask qualified local professionals about legal, insurance, lending, or accounting questions; this planning guide does not replace that advice.

Step 8

Finish with a documented walkthrough

Closeout should confirm the agreed scope, capture remaining items, and leave the owner with the records needed to operate and maintain the finished space.

Walk the project in good light and use the written scope as the reference. Record incomplete or corrective items clearly, identify who owns each item, and assign the next step. Separate a true completion item from a new request that was not part of the original agreement.

Collect product names, finish details, care instructions, spare materials, approved change orders, inspection or permit closeout records when applicable, and any written labor or manufacturer warranty documents actually provided for the project. Do not assume a general warranty term from an advertisement or another contractor’s project.

Take final photos after the walkthrough list is resolved. A clean closeout file helps homeowners, realtors, property managers, and future service professionals understand what changed without reconstructing the project from scattered messages.

Interview Guide

Questions to ask a remodeling contractor

Use the same core questions with each contractor, then follow up on the answers that depend on the room, address, or proposed scope.

  1. 1Who will be the day-to-day project contact, and how often will updates be provided?
  2. 2What is included, excluded, allowed for, or expected to be owner supplied?
  3. 3Which selections must be final before scheduling or demolition?
  4. 4How will material availability and substitutions be confirmed?
  5. 5Who determines whether permits or inspections apply to this address and scope?
  6. 6Which plumbing, electrical, HVAC, or other specialty trades may be involved?
  7. 7How will the home, adjoining rooms, drive, and landscaping be protected?
  8. 8What happens if concealed damage or a scope conflict is discovered?
  9. 9How are change orders described, approved, priced, and scheduled before extra work proceeds?
  10. 10What payment milestones correspond to completed work or delivered materials?
  11. 11What should the homeowner expect during the final walkthrough and closeout?
  12. 12Which product information, care instructions, receipts, and written warranty documents will be provided at completion?

Printable Checklist

East Texas remodeling planning checklist

Use this one-page list before comparing proposals, scheduling demolition, or approving project changes. Last reviewed July 31, 2026. General planning aid only; confirm address-specific permit, contract, insurance, payment, and professional requirements with the appropriate local authority or advisor.

Scope and priorities

  • Write a one-paragraph project goal.
  • List must-haves, nice-to-haves, and out-of-scope areas.
  • Photograph existing conditions and adjoining surfaces.
  • Name the people authorized to approve decisions and changes.

Estimate and selections

  • Compare proposals by matching scope, not by total alone.
  • Mark every allowance, exclusion, owner-supplied item, and unknown condition.
  • Confirm key product models, quantities, colors, sizes, and lead times.
  • Keep a decision reserve for choices or conditions that are not yet final.

Schedule and the occupied home

  • Confirm permit responsibility and address-specific requirements.
  • Plan access, parking, staging, dust control, cleanup, and debris removal.
  • Arrange backup bathroom or kitchen use before demolition.
  • Create a safe plan for children, pets, valuables, and work-from-home needs.

Changes, payments, and closeout

  • Agree that scope or price changes are documented before extra work begins.
  • Match payment milestones to the written agreement and project progress.
  • Keep approved selections, change orders, photos, and payment records together.
  • Complete a written final walkthrough list and collect care and warranty documents.

Keep Researching

Use project-specific pages for the next decision

Review actual project imagery and narrower planning topics before turning the guide into a room-by-room scope.

See the project gallery

Review company-published bathroom, shower, flooring, and kitchen imagery without assuming an unpublished location or project history.

Browse project imagery

Choose a service guide

Move from general planning into bathroom, custom-shower, flooring, or kitchen scope.

Review remodeling services

Verify the project area

Check the current Longview, Tyler, Gilmer, and nearby East Texas service-area guidance before requesting an estimate.

Review service areas

Have a written scope and need a project conversation?

Share the project address, room, goals, known constraints, and the decisions already made. Pioneer Construction can confirm whether the project fits its current service area and next-step process. Call (903) 364-6195 or use the project request form.

Tell Us About the Project