
Project Type
Shower insert replacement and custom tile shower conversion
Project Case Study
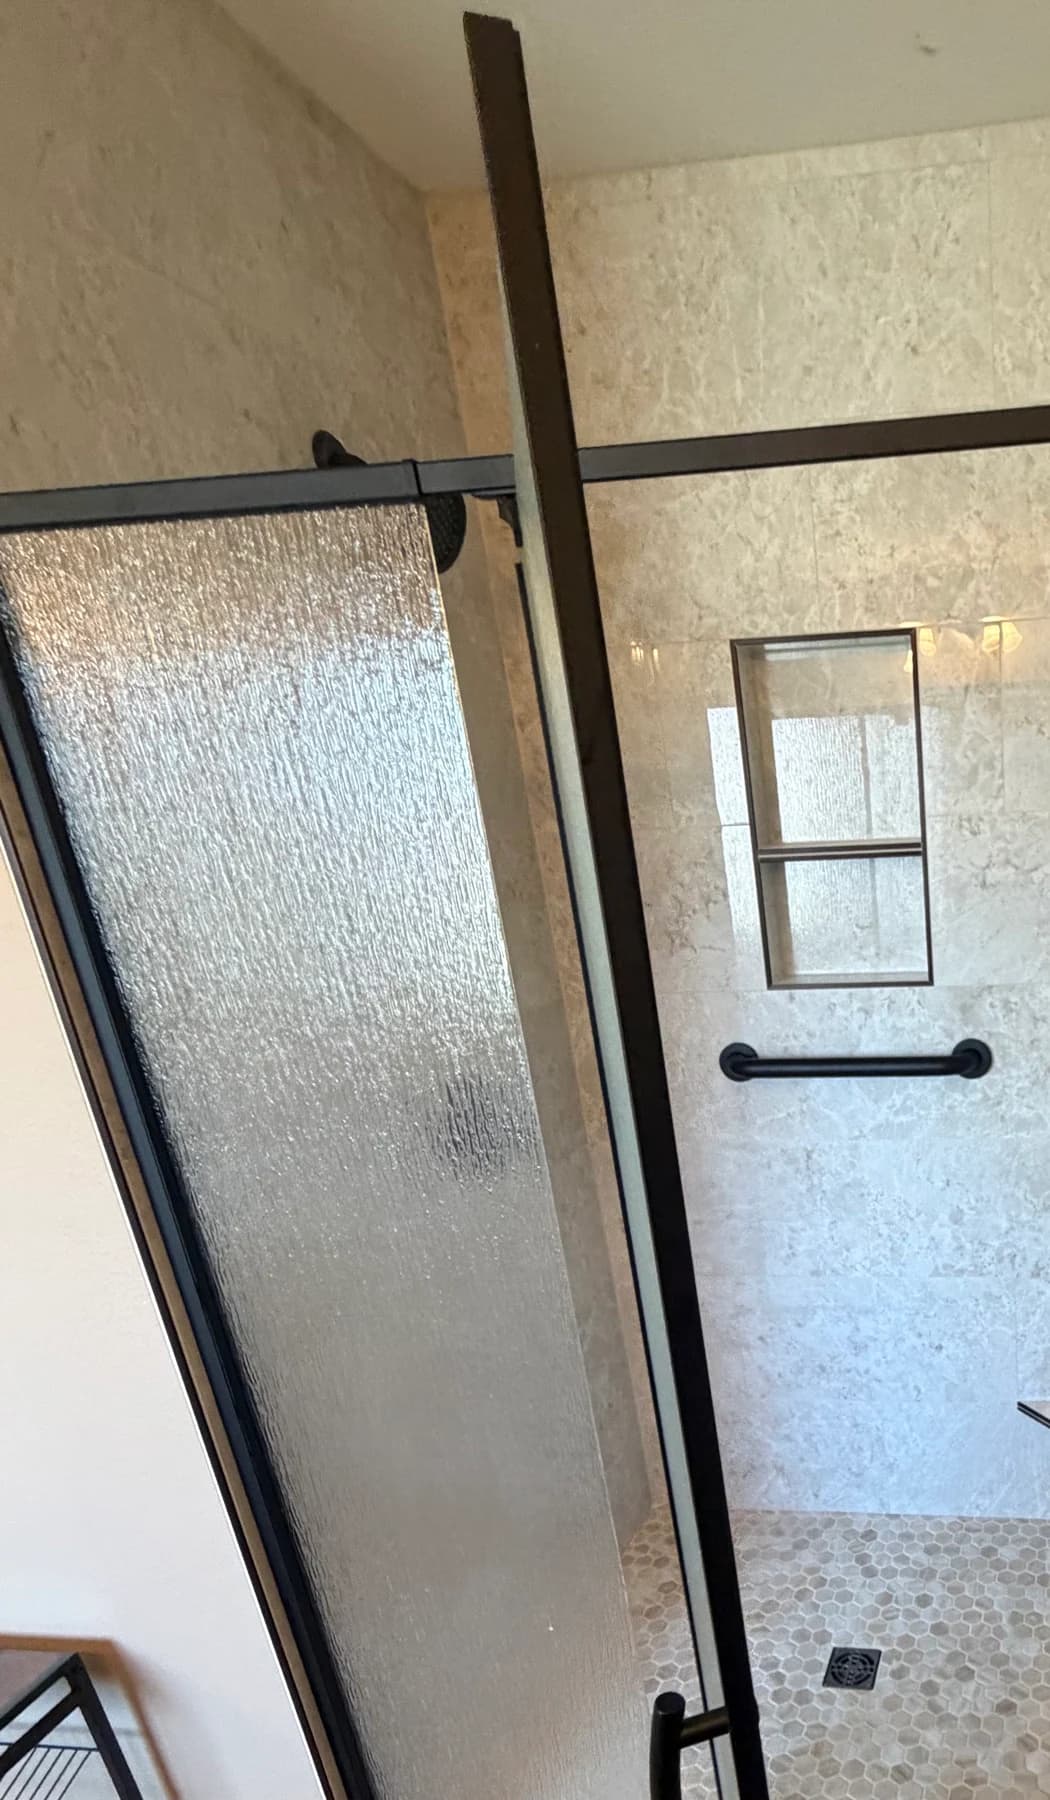
Pioneer removed the existing shower insert and enclosure, opened the concrete for a custom pan, and built a tiled shower within the same bathroom space. The completed shower pairs light wall tile, a mosaic floor, recessed niche, grab bar, and black shower hardware with a black-framed glass enclosure.
Project Snapshot
The verified scope stayed inside the shower area and coordinated the pan, tile, storage, grab bar, and finished enclosure around the black hardware visible in the completed shower.
Project Type
Shower insert replacement and custom tile shower conversion
Location
East Texas
Existing Shower
Prefabricated shower insert with framed textured-glass enclosure
Work Completed
Demolition, concrete removal for the custom shower pan, mosaic shower floor, tiled walls, recessed niche, grab bar, and glass enclosure
Main Transformation
A molded shower insert was replaced with a site-built custom tile shower
Before and After
The sequence moves from the original enclosure and molded insert to the open tiled shower and the completed black-framed glass enclosure.
Project Overview
This East Texas project was a shower-only conversion. Pioneer Construction replaced the prefabricated shower system without presenting the work as a remodel of the entire bathroom. That boundary matters when homeowners compare examples: a shower insert replacement has a different scope from a project that also changes the vanity, room flooring, lighting, or overall layout.
Keeping that definition narrow gives homeowners a more useful comparison point. Someone planning the same type of conversion can separate the pan, tile, storage, hardware, and enclosure decisions from optional work elsewhere in the room. It also keeps this documentation aligned with what the project photographs and supplied facts actually establish.
The finished work shows how the shower components were planned as one assembly. The custom pan supports a tiled floor, the wall tile surrounds a recessed storage niche, the grab bar adds a practical point of stability, and the black shower hardware shown in the completed space coordinates with the finished enclosure. Homeowners can review Pioneer's broader East Texas service area before asking whether a similar focused project fits the current schedule.
Before
The starting point was a prefabricated shower insert behind a framed textured-glass enclosure.
The original shower used a white molded insert with an integrated base and molded storage areas. A black-framed textured-glass enclosure closed the opening. That setup limited the shower surfaces and storage to the shapes built into the prefabricated system. The before photos document the existing configuration, but they do not establish that it was leaking, damaged, unsafe, or failing. The verified reason for the work is the conversion itself: replacing the insert with a site-built tiled shower.
Demolition and Prep
The enclosure and molded insert had to come out before the custom shower-pan area could be formed.
Pioneer removed the existing shower enclosure and prefabricated insert, exposing the shower area for the new work. The crew then broke out the necessary portion of the concrete slab to create the area for the custom shower pan. This was targeted concrete work tied to the pan construction, not evidence that the shower was expanded or that the plumbing was relocated. The available project facts do not verify a drain move, so none is claimed here.
Shower Pan
A site-built pan created the base needed for the tiled shower floor.
With the insert and required concrete removed, Pioneer built the custom shower-pan area and finished the shower floor with small hexagon mosaic tile. Smaller mosaic pieces can follow the changing plane of a shower floor more readily than large tile, while the many grout joints add visual scale and texture. In general, a tiled shower floor must be shaped so water has a path toward the drain. This case study does not identify a specific waterproofing product, system brand, inspection, or drain relocation because those details were not provided.
Tile and Storage
Light-colored large-format wall tile and a divided niche define the new shower interior.
The new shower walls were finished with light-colored large-format tile. Larger pieces reduce the number of grout lines across the walls and let the stone-like pattern continue around the shower. On the back wall, Pioneer created a recessed niche divided into two compartments and edged it with dark trim. The built-in compartments provide a defined place for shower items without relying on a hanging organizer, and the dark border connects the niche visually to the black shower hardware and enclosure frame.
Practical Details
The grab bar adds a practical stability feature alongside the black shower hardware shown in the completed space.
The completed shower shows black shower hardware against the light wall tile. Because black hardware is also visible in the before photos, this case study does not claim that Pioneer replaced the shower head, valve, or controls. Pioneer added a horizontal grab bar below the niche. The bar gives the user a stable handhold for everyday shower use. Its presence is not presented as proof of ADA compliance, medical necessity, or wheelchair accessibility; it is a practical feature within this specific shower. The consistent black finish helps the bar, shower controls, niche trim, and enclosure read as one coordinated set of details.
Enclosure
The black-framed textured glass completes the edge of the new tiled shower.
The conversion was completed with a black-framed textured-glass shower door and enclosure. The textured glass provides visual separation while still allowing the light wall tile, niche, and mosaic floor to remain visible from outside the shower. Its black frame repeats the finish used on the shower hardware and niche trim, giving the new work a consistent outline without changing the verified shower-only scope.
After
The prefabricated system became a coordinated site-built tile shower within the existing bathroom.
The finished shower replaces molded walls and a prefabricated base with a tiled pan, large-format wall tile, built-in storage, a grab bar, and a matching glass enclosure. The black shower hardware remains a visible, coordinated part of the completed space without being presented as a verified replacement. The result is documented as a focused transformation of the existing shower—not a full bathroom remodel and not a claim that the shower footprint or plumbing location changed. More examples of Pioneer's shower, bathroom, flooring, and kitchen work are available in the project gallery.
Homeowner Planning
The points below are general planning guidance, not claims that unlisted work occurred on this project.
A shower insert conversion puts several decisions behind the finished tile, so the planning sequence matters. Homeowners can use Pioneer's tile shower waterproofing guide to understand why the system behind tile should be discussed separately from the visible finish. If the proposed work also includes the vanity, room floor, lighting, or other areas outside the shower, compare that wider scope with Pioneer's bathroom remodeling service instead of treating every shower conversion as a full-room project.
Share the existing shower, the features you want to add, and the project location. Pioneer Construction can review the actual space before preparing an estimate.