
Project Type
Focused bathtub replacement and tile surround update
Project Case Study
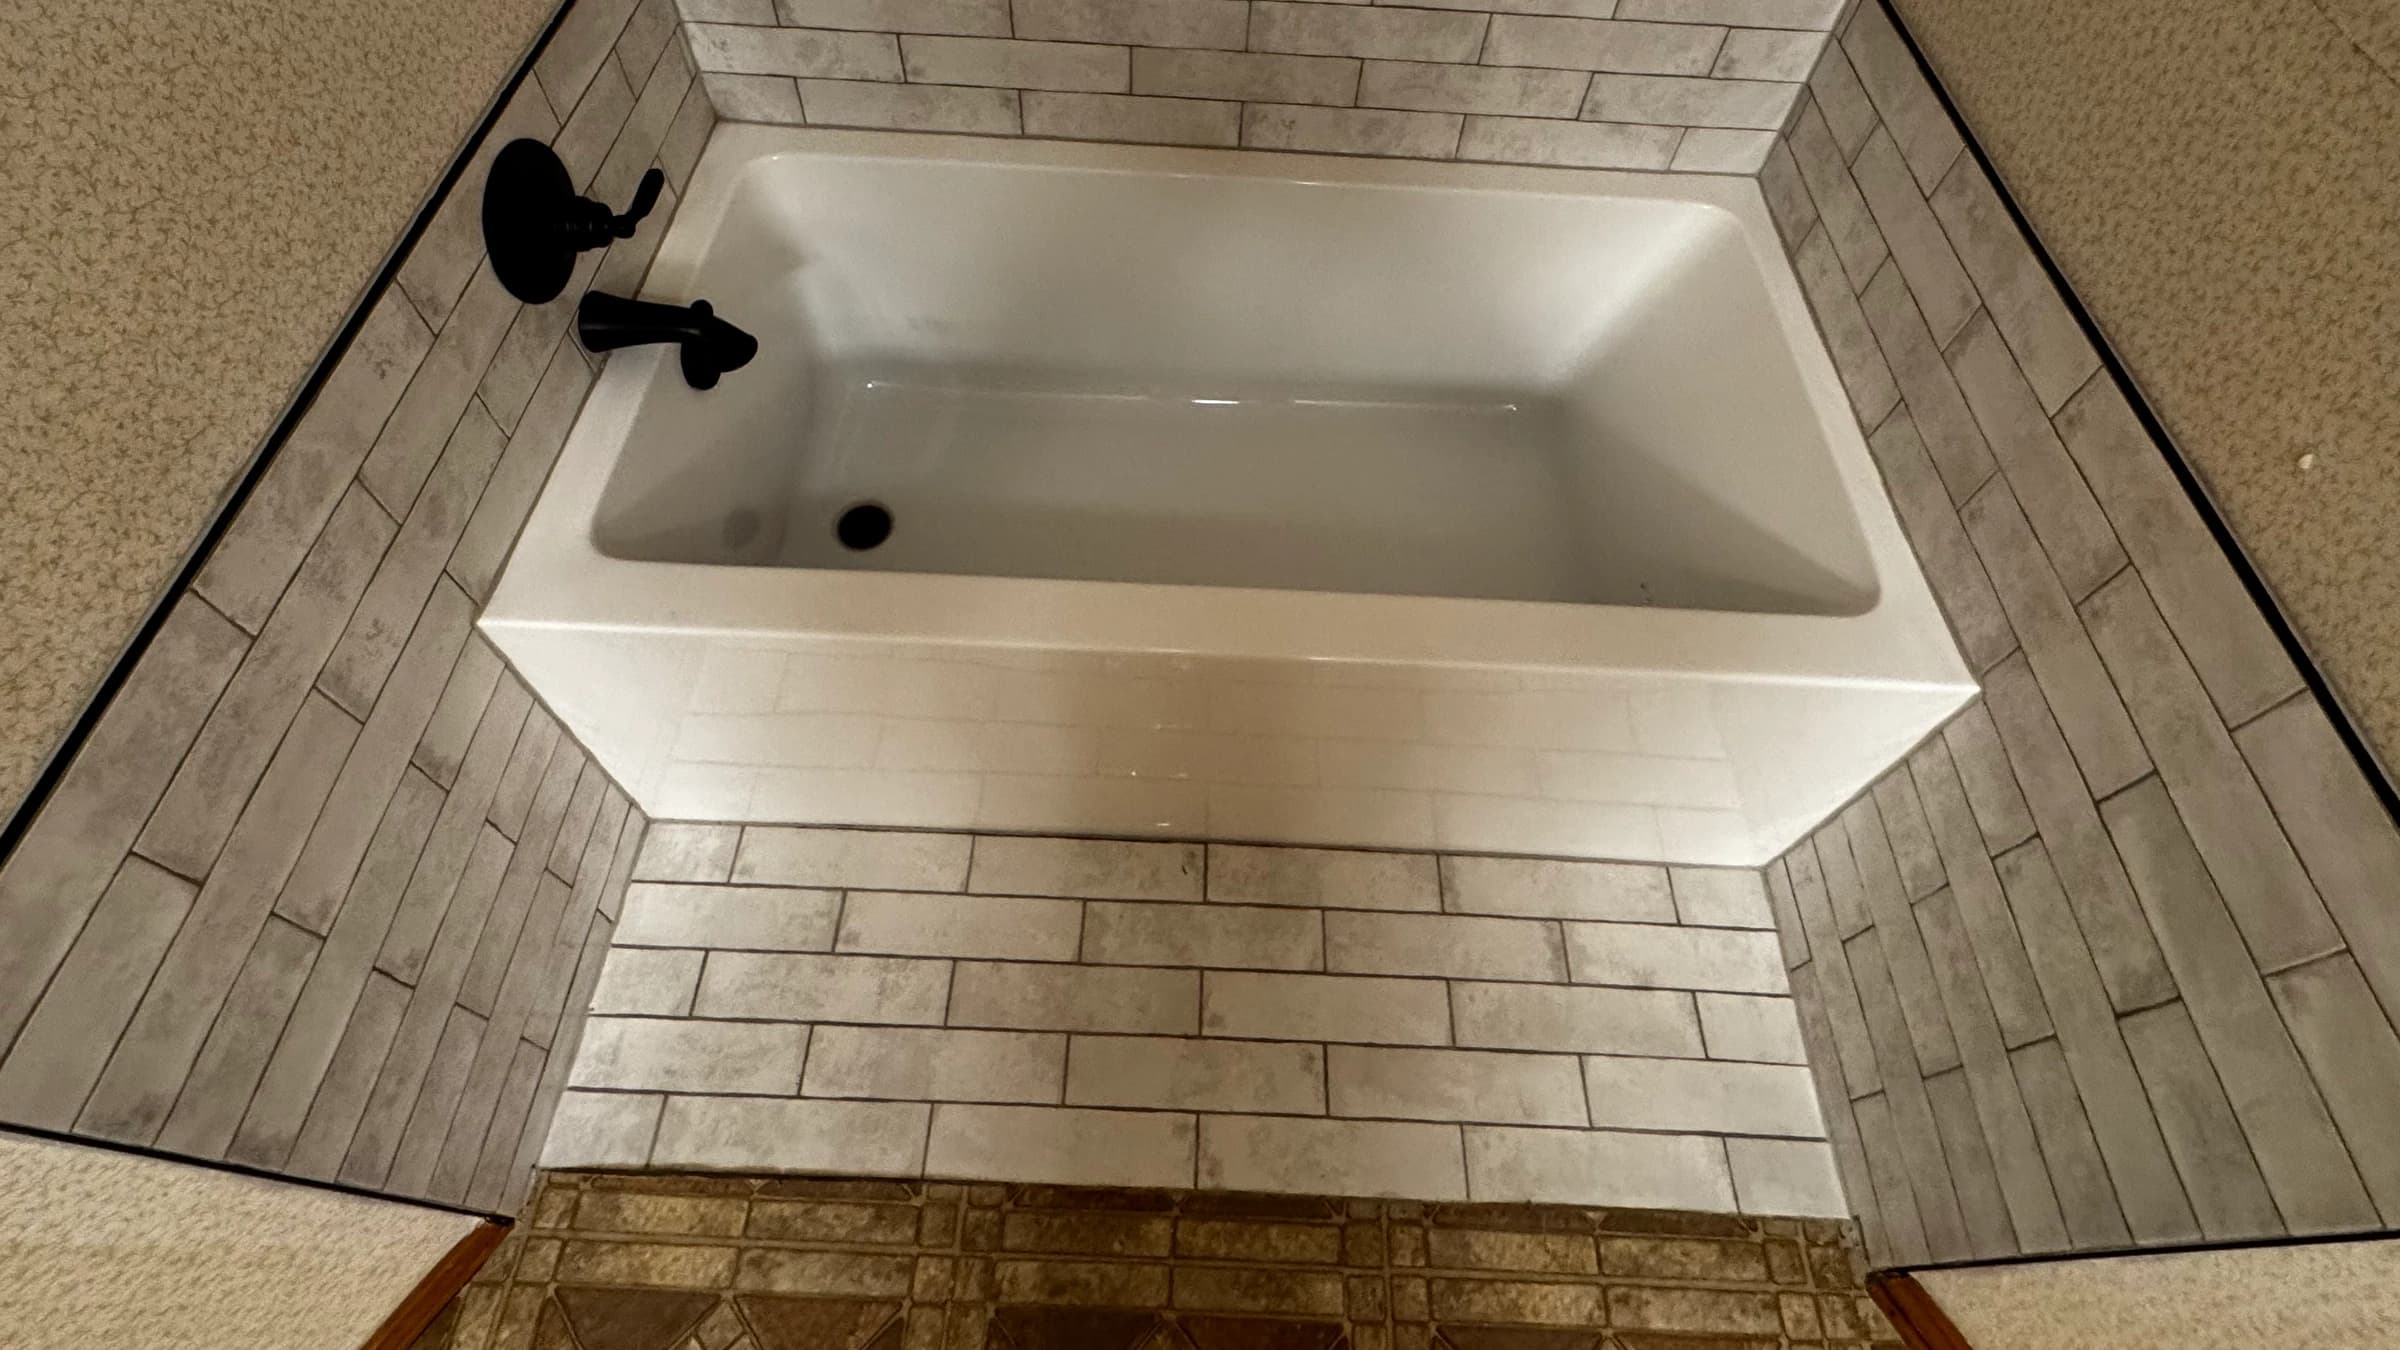
Pioneer Construction completed a focused bathtub replacement in Flint, TX. The older beige built-in tub and integrated step were removed and replaced with a new white bathtub. Light rectangular tile, dark edge trim, and black tub hardware gave the tub alcove a cleaner, more coordinated finish while the surrounding bathroom remained outside the project scope.
Project Snapshot
The project replaced the existing built-in tub and refreshed the immediate bathtub area while retaining the surrounding room finishes outside that focused scope.
Project Type
Focused bathtub replacement and tile surround update
Location
Flint, TX
Original Tub
Older beige built-in bathtub with an integrated front step
Replacement
New white rectangular bathtub
Visible Finished Features
Light rectangular tile, tiled tub-area floor, dark edge trim, and black tub hardware
Scope Boundary
The work focused on the bathtub alcove rather than the entire bathroom
Before and After
The sequence moves from the original beige built-in bathtub to the completed white bathtub, tile surround, tiled tub-area floor, dark edge trim, and black hardware.
Project Overview
The customer wanted the existing bathtub removed and replaced with a new bathtub. Pioneer Construction completed that focused scope in Flint, Texas, replacing the older beige built-in tub and integrated front step with a new white rectangular bathtub.
The completed tub alcove pairs the white bathtub with light gray-and-white rectangular tile across the lower walls and the floor immediately around the tub. Dark edge trim defines the tile boundary, while the black tub spout and control add contrast against the lighter surfaces.
This case study documents the bathtub area rather than presenting the work as a remodel of every bathroom surface. Homeowners can review Pioneer's broader bathroom remodeling services or confirm current coverage on the service areas page.
Before
The before photograph shows the older beige built-in bathtub, integrated front step, surrounding ledges, and narrow decorative tile accent.
The original bathtub was an older beige built-in unit with an integrated front step and ledges around the opening. A narrow decorative tile accent followed the lower wall around the tub. Those visible features gave the original area a different footprint and finish from the completed white bathtub installation.
The customer's goal was straightforward: remove the existing bathtub and replace it with a new one. This case study stays centered on that requested bathtub-area update.
Removal
Pioneer removed the older built-in bathtub so the recessed area could receive the replacement. Removing a unit with an integrated step and surrounding ledges changes the visible footprint inside the opening, which is why the before-and-after views are useful for understanding the finished layout.
The project sequence stayed centered on the alcove: remove the existing tub, install the replacement bathtub, and coordinate the visible tile and trim immediately around it.
Replacement Bathtub
The finished photographs show a new white rectangular bathtub with a straight front face.
The completed project features a new white rectangular bathtub. Its straight front face replaces the original integrated-step profile and creates a simple visual center for the light rectangular tile and black bathtub fixtures around it.
For a future bathtub replacement, homeowners should measure the available opening, wall clearances, fixture locations, drain location, and access route before choosing a product. The selected bathtub's dimensions, material, and weight also need to be confirmed from its documentation rather than inferred from appearance.
Those are general planning considerations for future projects. This Flint case study stays with the visible replacement bathtub and the surrounding finished surfaces shown in the photographs.
Tile Update
Light gray-and-white rectangular tile now runs across the lower walls on three sides of the bathtub. Matching subway-style rectangular tile continues across the floor within the tub alcove, creating a visible connection between the wall finish and the area immediately in front of the new bathtub.
The dark grout lines make the staggered layout easy to see, and dark edge trim finishes the outer and upper tile boundaries. The description stays with the visible color, shape, layout, and edge treatment without assigning a specific tile material.
Homeowners planning a similar update should decide the tile layout, wall preparation, edge treatment, floor transition, and water-management details before installation. New tile also needs a deliberate meeting point with any wallpaper, painted wall, or other finish that will remain.
Finish Details
The completed bathtub area includes a black tub spout and control. The black tub hardware stands out against the white bathtub and light tile, while the dark tile-edge trim carries that contrast around the perimeter of the finished surfaces.
The photographs show the visible color and placement of these finish elements, so the description stays with the black tub hardware and its contrast against the lighter surfaces.
Focused Scope
The existing wallpaper, patterned bathroom floor outside the tub alcove, wood doors, wood trim, and other room finishes remained outside this focused project. The angled completed photograph makes that boundary visible: new tile covers the lower walls and floor inside the bathtub area, then meets the retained surrounding surfaces.
A bathtub replacement does not automatically require changing every finish in the room. Defining what will remain can keep an estimate and planning conversation centered on the homeowner's actual goal. It also prevents a focused tub-area project from being confused with a complete bathroom remodel.
Finished Result
The visible transformation is clear: the older beige built-in tub and integrated step were replaced with a new white bathtub; light rectangular tile now covers the lower walls and tub-area floor; dark edge trim defines the tile boundaries; and black tub hardware completes the focused update.
The completed photographs document the tub alcove as it appeared after the work, without presenting unrelated upper-wall or room conditions as part of Pioneer's finished scope. More completed work can be reviewed in the Pioneer project gallery.
Homeowner Planning
Use this general checklist to define the product, transitions, retained finishes, and estimate scope before work begins.
Homeowners comparing proposals can use Pioneer's guide to understanding differences between bathroom remodel quotes to check whether the same surfaces, fixtures, transitions, and retained finishes are included. The bathroom remodel scheduling guide also explains why scope and material decisions should be settled before treating a calendar estimate as final.